
All right guys and girls, here comes one of the most common things we Photoshop lovers do when we want to improve our photos. It’s called the S-curve adjustment. -Now what is that? Well In Photoshop there are many ways to adjust the levels of the dark and white areas in a photo. By intensifying these areas, a greater contrast is achieved in the photo you’re editing. SOOC images you grab directly from your camera tend to have a dull layer above them. The S-curve is exactly what is sounds like, it’s a path that looks like an diagonal lying “S”. In Lightroom there is a setting called “Tone Curve” (It’s called Curves in Photoshop) it works exactly like in Photoshop. The only thing this preset does is to apply this S-curve setting on your photos. That’s it, just +50 Lights and -50 Darks. Pretty simple but very effective. The preset is called “PH CleanUp S-Curve”.
If your images tend to be too dark or bright. Use a smaller value for each, like +25 and -25 instead.
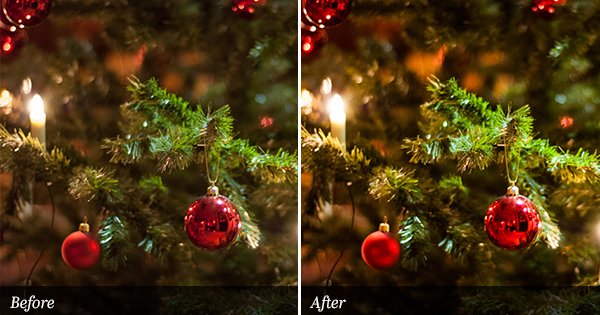
Preset in action
SOOC/ORIGINAL:

PH CleanUp S-Curve:


Thanks – your presets look wonderful
First, I LOVE your presets and don’t thank you enough. They really do stand out amongst the rest.
Next, I don’t really see the benefit of this S curve, with the execption of the Gold Piers, the orig looks a bit better when it comes to things like the Red Shirt in the lower right hand corner. Am I missing something. I think it’s very subjective however on one’s taste.
Again, thank you so much for your work, and sharing on all levels.
Tom
Hi Tom,
Thank you so much!
You’re right about the subjective thoughts here. As with all preset, I think it’s important to be aware of that they all make subjective behaviors. Maybe this preview image wasn’t the perfect one to use for this preset. But most of the time a small contrast adjustment (s-curve) can make the photos a bit sharper.